Showing posts with label DoItYourself. Show all posts

November 18, 2012

DIY Lamp Revamp

I had been planning to get a new lampshade and thought 'I could probably make this one look new for a whole lot less!' Here is a quick and simple way to make an old lamp look new. 


For this DIY you will need: 


  • A lampshade ribbon
  • ruler
  • pencil
  • glue
  • X-Acto knife
  • tape


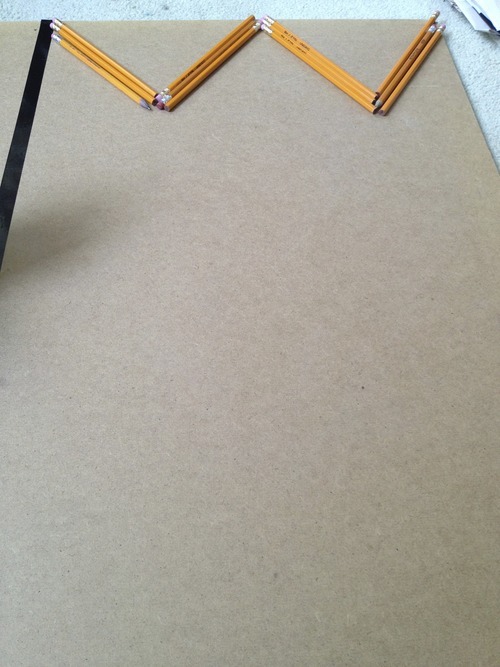
Choose where you want to place the ribbon and mark the places 1 inch apart for you to cut lines through the lampshade with your X-Acto knife. 


Weave the ribbon through the slits that you have made and put a piece of tape on the edge of the ribbon so that it does not fray.


Cut on three sides and leave the front side blank. This is where the ribbon will join together and you will glued down the two ends that meet.


While the ribbon is drying cut another piece of ribbon and create a bow.Make sure that your bow is how you like it and then glue the middle down so that it doesn't come apart when you are using your lamp.


Glue the bow onto the side of the lamp where ribbon edges meet. This will ensure that the raw edges of the ribbon are covered by the bow. Put glue on the back of the bow and adhere carefully make sure it is exactly how you want it because it will be stuck forever!


Trim off the excess ribbon and make sure the two ends of the bow are equal. Make sure you Erase the Pencil Marks for a flawless look. You are now finished!

November 13, 2012

DIY Gold Tipped Collar shirt

When TopShop opened at The Bay queen street in Toronto I saw a gorgeous white sheer shirt with a simple Gold tipped Collar. I included a similar one on my weekly picks and promised this tutorial. There was no way I was going to fork out $70 (at least not right then and there.) I figured it couldn't be that hard to make my own version of of. 


I went ahead and ordered the gold collar tips off of an Ebay seller for less than $5 for the 4 that I was going to use. The Shirt cost me $15 from a store called Katie. The total cost was $20 versus $70. I think the hardest part of the entire project was waiting for the clips to come in.


For this project you will need:

1 Sheer top with a collar and cuffed sleeves
2-4 gold collar tips
Needle nose pliers 

November 06, 2012

DIY up-cycled Cotton Swab Holder

Here is a simple and quick tutorial for up-cycling used containers. I keep my cotton swabs in an old eye make up remover pad container. It had been sitting in my bathroom for months and I constantly looked at it saying it really could have been prettier if I tried. I decided to grab some of my washi tape (my go-to right now)and wrap it up with the designs I liked. I thought the tape I used at the top with the weekdays looked perfect for something I use daily. I covered the threads of the container so it didn't have anything in a stark white.


 I am glad with how it turned out. I don't really mind that you can see the words through some of the tapes. If you dont want that just make sure to use something darker or more solid. Just remember to end and finish all the tapes on the same side so there are only seams on one side. 

October 08, 2012

DIY: Book Paper Flower

This is a tutorial I found on Pintrest and decided to do a rendering of my own by following the instructions from it.


For this project you are going to need:


  • Book Paper
  • White Glue
  • Scissors
  • Stem / 20 gauge wire/Thin wooden dowel
  • Green grosgrain ribbon


After choosing your book paper, cut out 5 pieces of 5 arch shapes in 5 different sizes for a total of 25 pieces. Make sure you keep the font in one direction so that the final product looks cohesive.  
Ben the center of each 'petal' and create a rounded edge by curling in the top to give a more natural shape.

I used a mini clothing peg to hold the petals together in order for the crease to be really crisp. I had arranged 5 sets from smallest to largest. 

Once you are satisfied with the crease, start with the smallest piece a wrap around the wire, dowel or stem. I had used a stem from an old faux flower of which I had cut the top off. 

October 01, 2012

DIY Cap toe studded flats


Transform some plain flats into a pair of gorgeous gold cap toe studded flats!


Here is what you will need:

  • Plain flats (mine cost only $7)

  • Gold spray pain (on hand)

  • Gold pyramid studs ($3/20)

  • Masking tape

  • Scrap paper

  • Needle 

  • Pliers 


Start with a pair of plain flats, make sure they are cleaned on the surface.


Mask off the section that you want to be gold. The depth is your own choice. Make sure there are no gaps, and that the tape is as flat as possible. You do not want the gold to seep into the clean white space.


Once that is taped off take a scrap piece of paper and cover the rest of the shoe so that the spray paint does not sprinkle all over the shoes.  Once the spray paint is on, let the paint dry in front of a fan or just air dry. The paint will need to be completely dry before any tape is peeled off. Remove the paper and tape and make sure lines are straight.


Decide where you want to place the studs. Push the pins of the stud into the material so that there is an impression. Use a thick sewing needle in order to pierce through the shoe and then push the stud through. Use pliers to flatten the pins in the inside of the shoe. Repeat where ever you add studs.


I thought that the inside would irritate with the studs but I could not feel them at all. One tip I would recommend when purchasing ‘cheaper’ shoes is to get half a size larger and use gel cushions in the back so that the shoes will be comfortable enough to wear.


Now you can wear your one of a kind shoes with pride!

September 15, 2012

DIY Heart Garland

This is a simple project that you can use to decorate gifts with, use for a party or simply string around a room to add some charm.


For this project you will need

  • A heart shaped punch or scissors to cut it out

  • Bakers twine

  • Glue

  • Patterned paper

  • Plain paper


The first step will be to choose your favourite type of paper (I chose book type)

.  

to use to punch or cut out the shape you would like. repeat with the plain paper as well to create a backing. If cutting it out with scissors, be sure to cut one plain and one patterned at the same time as you will be gluing them together

August 25, 2012

DIY: Extra Pen/Pencil Display

I finally created this piece for my room and these DIY instructions for you.


Here is what you will need:


  • Tons of extra pens and pencils

  • Plywood Board

  • Hot Glue guns

  • glue sticks

  • spray paint primer

  • Gold spray paint

  • lined paper

  • adhesive spray glue


Start by collecting all of mishmash of pens and pencils


Separate, organize and sort the pencils/pens (put aside the ones you really want to keep…these were just too good to use up!)


My plywood board was a lot bigger than I needed it so I taped off the part that I did not need and planned to saw that off.


Start by placing pencils on top and working your way down, creating a pattern.


If you wanted you could use just the pencil crayons and put them in colour order.


I arranged my board to my liking, having pencils on top, pencil crayons down the middle and finally pens/mechanical pencils and bigger markers near the bottom. My plan was to use up everything I had and paint over it. 


Once arranged, heat up the glue gun and start gluing things down. Always plan first and then glue so that you are sure you like what you have made.


I finally filled in the bottom gap of plywood with some crunched paper and stuck it on with a spray adhesive.


I tried to take the glued board out the window to spray paint it, however due to the lack of space I used it in (sort of well) ventilated room with newspaper covering the carpet. First Spray with a primer so that you are spraying on white and the colour comes out the best it can.


and the Final Product will look like this at the end! A Lovely add on into any room.

Pintrest "pin it"

Related Posts Plugin for WordPress, Blogger...