Showing posts with label paper craft. Show all posts

December 11, 2012

(Six!!) DIY gift wrapping styles

Hey Everyone!
This is a post I have been wanting to do for a while. I just had to make sure I had enough material to put this together.Now that I have wrapped a total of six gifts so far, here are 6 ways to wrap anything! 

1)It started with a gift I made then wrapped for a good friend of mine. I started with some plain kraft paper that I have in a large roll. Kraft paper is the best investment to make! I am in love with all the things that you can do with it, as you will all see in all the photos. Follow through for directions of what I did to make these look like they did.
 

  •  For the first gift I stamped using a large polka dot background I have and some black pigment ink. I did not aim for perfection because it was really not needed for a gift wrap. I wanted this to look like I had handmade it and not bought it preprinted. 
  • While this was drying I punched out a strip of white paper using the Martha Stewart Double Edge punch in doily lace. This is one of my favourite double edge punches. It is so simple but you can do so much with it. I used some Tim Holtz Distress Ink in Vintage Photo to get the edges distressed in a colour that matched the kraft paper. 
  • I added some vintage book paper around the wrapping paper and the top bit of the doily lace punch at the bottom portion of the gift. 
  • I distressed a tag with the same Tim Holtz Vintage Photo ink and ran some twine though the top, stamped a small camera in the corner and the recipient's name. 
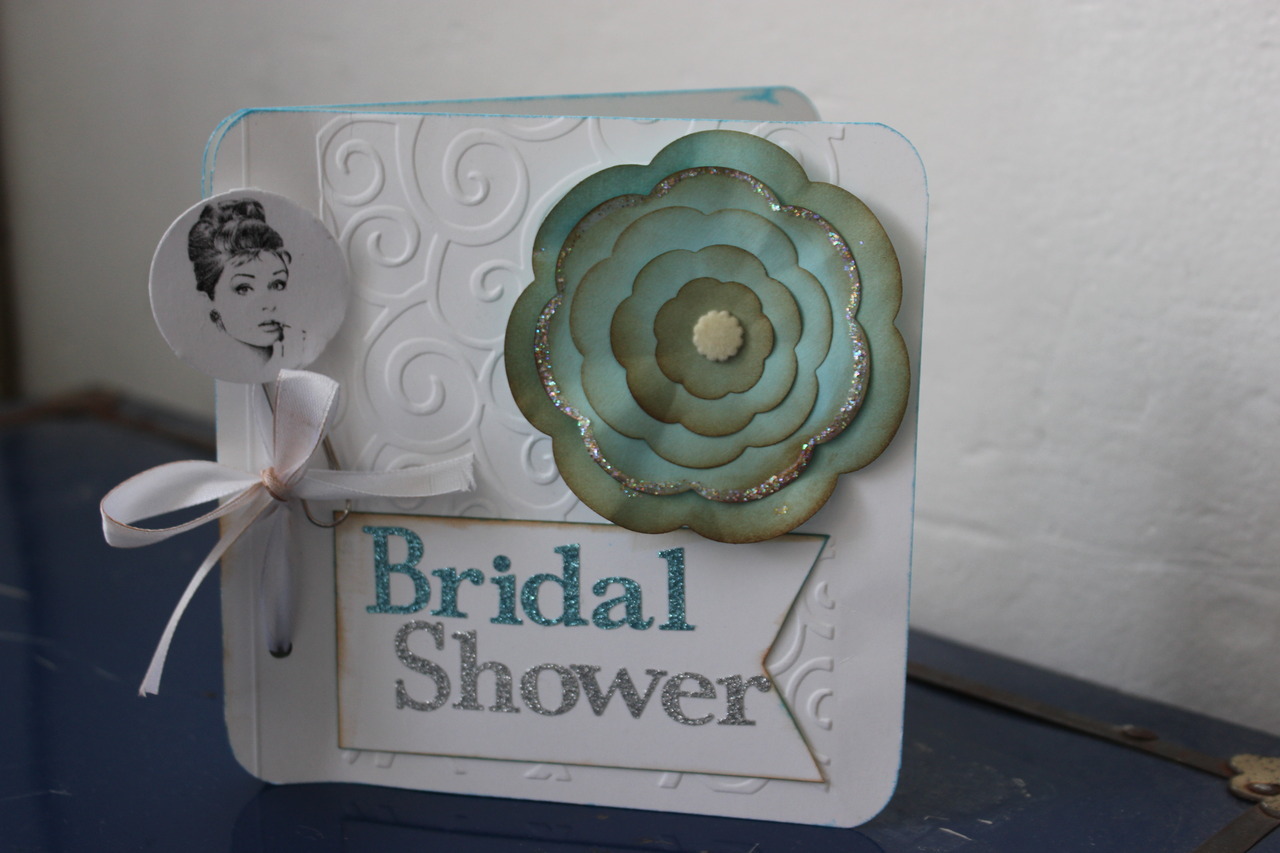
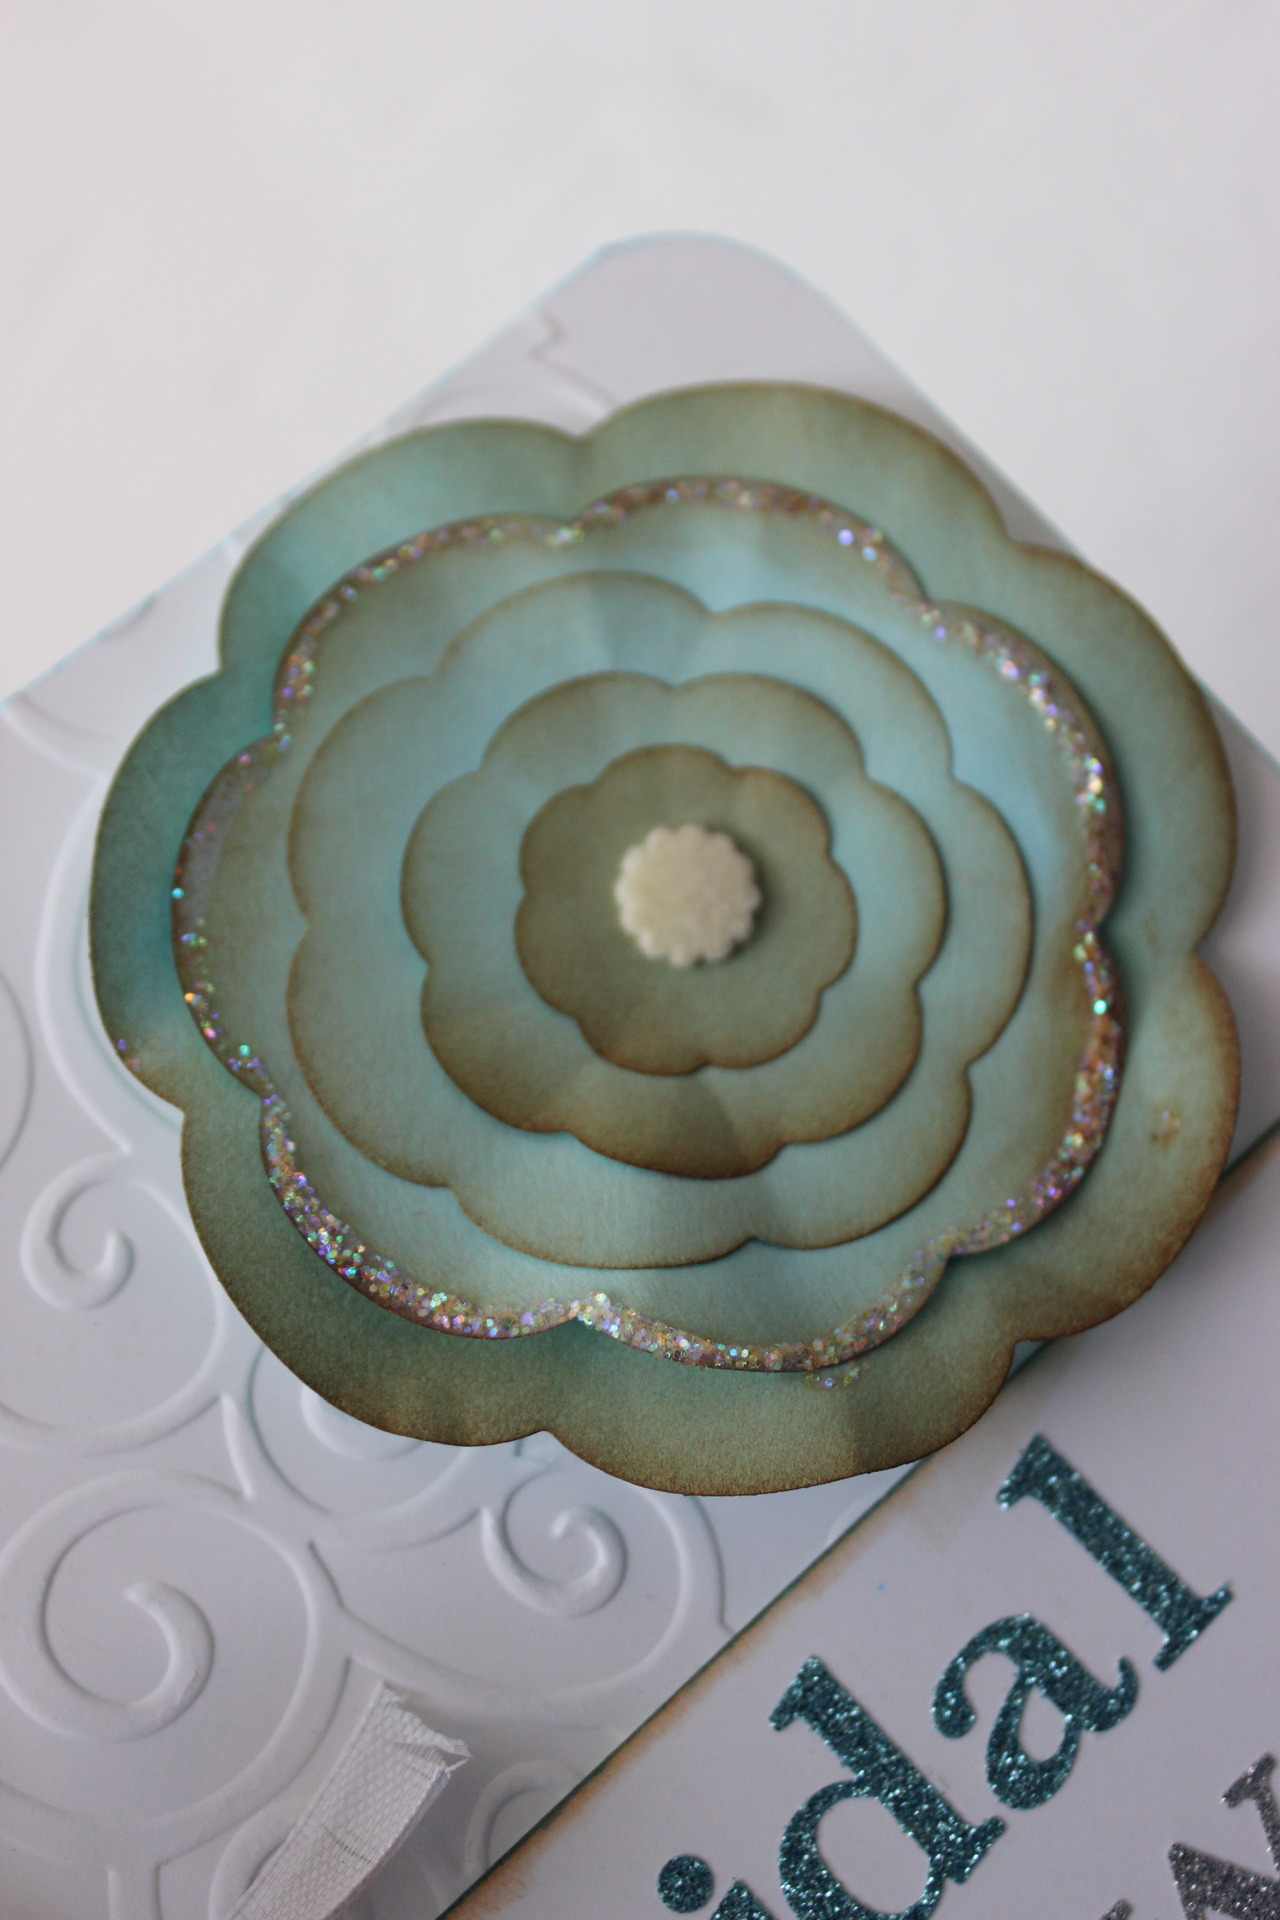
  • My last two touches were tying jute twine around the middle of the vintage book paper and adding a handmade flower (Which I will do a tutorial for soon!)

2)  next gift was for a secret santa present. This was very quick to do and looks really nice. 


November 25, 2012

Picks of the Week

Ive been a little busy with orders I have been receiving for some products over the last week. I decided I would still put up some picks for this past week. Here is a collection of some new products. I would like to openly declare that I love wallpaper! This metallic stag wallpaper is so beautiful and would add a great warmth to a small space. I can just see it in a small wall above my workspace. Just looking t this had made me want to re-do my craft room with some new wallpaper! I have also shown these cute October Afternoon tin pins for scrapbooking or other crafting. I have a small collection of flat back pins which I usually put into my smash book which I will be sharing soon! I love this set of 5 post card prints from by April and May.  I have been using twine for everything lately and really believe that I should invest in a larger spool, this grey colour is really great because it isn't as stark as black and white and has just the colour to mix and match with everything. Lastly I found this amazing envelope clutch on Etsy with an amazing print on it by Roxy Marj.


Metallic Stag Wallpaper from Anthropologie
Tin Pin Badges from October Afternoon
Post Card prints from by April and May
Divine Twine from The Paper Place

November 03, 2012

Picks of the Week

Hey y'all! Here are my favourite things that I have been eyeing over the past week. Firstly, I love the look of these vintage knot and bow library cards. They remind me of my childhood, borrowing books, filling in your name while glazing over who had the book before you. I am ready to get my hands on a set of these for sure. The next stationary Item I am in love with and will probably be posting about more often is washi tape. I love washi tape, it is so handy and easy to use. You can do tons of DIY washi tape projects which I will share here. Lastly, In the stationery favourites I have this amazing Coccoina Glue. This is a potato based almond smelling glue or paste. I have used it before and just love it. I am waiting to get my hands on it as soon as possible. Geometric shapes are really in right now. Weather this is in home decor, scrapbooking trends or the newest jewelry trend. Speaking of Jewelry, I tend to place all of mine in a bowl. I love the idea of having great pieces of decor incorporated into your organizing. It is a really the best way to store Jewelry.  


October 16, 2012

New packaging

This is why I love keeping my paper cut offs and repurposing them later. Looks so great with the typewriter detail.

October 08, 2012

DIY: Book Paper Flower

This is a tutorial I found on Pintrest and decided to do a rendering of my own by following the instructions from it.


For this project you are going to need:


  • Book Paper
  • White Glue
  • Scissors
  • Stem / 20 gauge wire/Thin wooden dowel
  • Green grosgrain ribbon


After choosing your book paper, cut out 5 pieces of 5 arch shapes in 5 different sizes for a total of 25 pieces. Make sure you keep the font in one direction so that the final product looks cohesive.  
Ben the center of each 'petal' and create a rounded edge by curling in the top to give a more natural shape.

I used a mini clothing peg to hold the petals together in order for the crease to be really crisp. I had arranged 5 sets from smallest to largest. 

Once you are satisfied with the crease, start with the smallest piece a wrap around the wire, dowel or stem. I had used a stem from an old faux flower of which I had cut the top off. 

August 03, 2012


I created this handmade book for a friend of mine whose bridal shower I had planned in January. I used a Cuttlebug embossing folder to create a design on 120lb ultra thick card stock I purchased at simonsaysstamp.com  and then used a Spellbinders Nestablities peony die to cut out the shape of the flower. I used some Tim Holtz vintage photo on the edges of the flower petals to give them some dimension and finally adhered the flower using a pop dot. I then took some ribbon and put the book together by creating a bow with some white silk ribbon which was from the bridal shower. I used my cropadile to punch holes through the book and was able to get the entire book punched through in one shot which was awesome! It is one of my favourite tools for sure!! I used the Tim Holtz distress ink to add some color to the ribbon so it could match the flower and did the same for the banner ended title and using some glitter font from Making memories to follow through back onto the theme of the shower. Lastly I added that final paperclip with the Audrey Hepburn images to the corner to once again bring back the memory of the shower. I will be posting some images from the shower in a later post and the DIY items I created for that event!

Pintrest "pin it"

Related Posts Plugin for WordPress, Blogger...